Introduction
Welcome to the official guide on publishing your content on ShareTXT — a fast, straightforward self-publishing platform that gives writers, creators, and professionals the ability to share their work directly with a growing audience.
ShareTXT uses a self-publishing model, meaning you maintain full control over your content from start to finish. You write, format, optimize, and publish your articles yourself without needing approval before going live (though all published content remains subject to review as outlined in our Terms of Service).
Whether you’re writing about technology, finance, productivity, lifestyle, or any other topic, ShareTXT allows you to publish high-quality articles complete with SEO optimization, social sharing previews, do-follow links, and a clean, professional blog layout.
Ready to publish?
Head over to the ShareTXT Publisher Dashboard:
👉 https://publisher.sharetxt.live
Before you begin, we strongly recommend reading our Terms of Service to understand the rules, content guidelines, and publishing policies.
In this guide, we’ll walk you through the entire publishing process step by step — from opening the editor to seeing your article live on https://sharetxt.live/blog .
Table of Contents
- Introduction
- Getting Started – The Publisher Dashboard
- Navigation Bar
- Metadata + Editor Section
- Previews Section
- Publishing Your Article
- Additional Tips & Best Practices
- Frequently Asked Questions (FAQ)
- Conclusion
Getting Started – The Publisher Dashboard
Once you visit https://publisher.sharetxt.live , you’ll land on the clean and intuitive publishing editor.
Here’s what the full dashboard looks like:
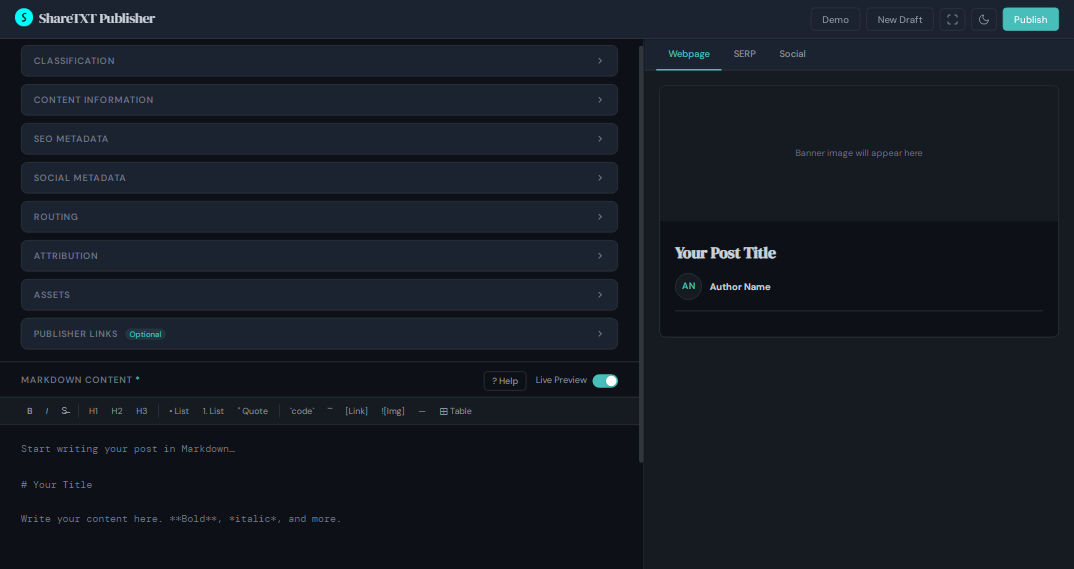
The interface is divided into three main areas:
- Top Navigation Bar – Contains all the action buttons (Demo, New Draft, Focus Mode, Theme Toggle, and Publish).
- Metadata + Editor Section (Left/Main Area) – Where you enter all your article details, metadata, and the actual content.
- Previews Section (Right Sidebar) – Real-time previews showing how your article will appear on the web, in search engines, and on social media.
The editor is designed to be user-friendly while giving you complete control over how your content will look and perform once published.
Quick Tips Before You Start:
- All required fields are clearly marked.
- Many fields (SEO, Social Meta, Slug) are auto-filled based on your title and description, but you can always edit them manually.
- Changes you make are reflected live in the preview section (you can toggle this behavior if needed).
- You can switch between Light and Dark mode anytime for comfortable editing.
Now, let’s break down each section in detail, starting with the Navigation Bar.
1. Navigation Bar
At the top of the publisher dashboard is a clean navigation bar that gives you quick access to the most important actions.
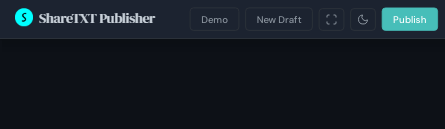
The nav bar contains 5 key buttons:
1. Demo
- Click this button to generate a complete demo article.
- It automatically fills all fields (title, description, content, images, etc.) with dummy data.
- Perfect for first-time users — use it to explore the editor and understand how everything works.
2. New Draft
- Clears all fields and resets the editor to a blank state.
- Use this when you want to start a completely fresh article.
- ⚠️ Warning: This action cannot be undone. Make sure you’ve saved or published any previous draft before using it.
3. Focus Mode
- Toggles Focus Mode on/off.
- When enabled, it hides the preview sidebar so you can concentrate fully on writing and filling in the metadata.
- Click Exit Focus Mode to bring back the previews.
4. Light / Dark Mode
- Switch between light and dark themes.
- Choose whichever mode is more comfortable for your eyes during long writing sessions.
5. Publish
- The primary button.
- Once you’ve filled all required fields and reviewed your previews, click Publish to proceed to the payment and final publication step.
Tip: Always use the Demo button first if this is your first time using the platform. It helps you get familiar with the entire workflow before publishing your own content.
2. Metadata + Editor Section
This is the main working area of the publisher dashboard where you will input all the details about your article.
The section is organized into several collapsible subsections for better organization. You can expand or collapse each one as needed.
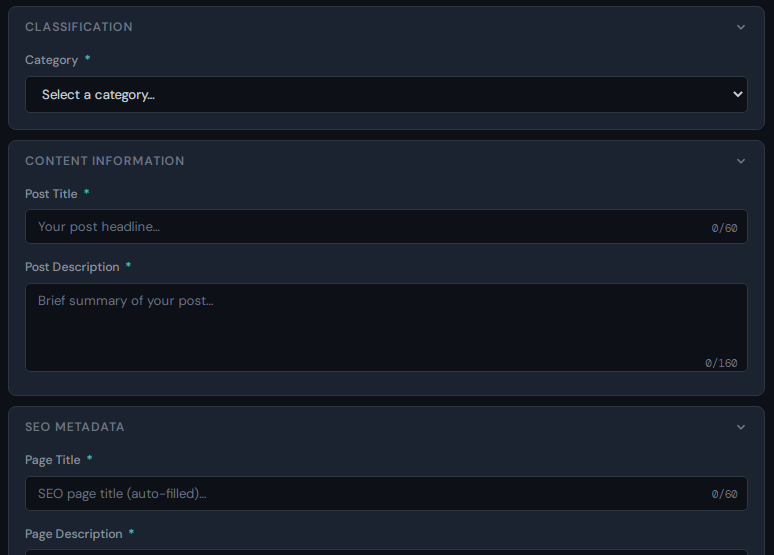
Classification
- Select the most appropriate category for your content.
- Available options: Writing, Finance, Tools, Productivity, Technology, Lifestyle, Others.
Choosing the right category helps with proper content organization and discoverability on ShareTXT.
Content Information
- Post Title — Enter a compelling title for your article (Maximum 60 characters).
- Post Description — Write a short summary or excerpt of your article (Maximum 160 characters).
These two fields are the foundation of your post and are used to auto-generate other metadata.
SEO Meta Data
- SEO Title and SEO Description.
- These are automatically generated from your Post Title and Description.
- You can edit them manually if needed.
- These fields determine how your article appears in search engine results (Google, Bing, etc.).
- Same character limits apply: 60 for title, 160 for description.
Social Meta Data
- Social Title and Social Description.
- Also auto-filled from your content information.
- These control how your article looks when shared on social media platforms (X, Facebook, LinkedIn, etc.).
- Same character limits: 60 / 160.
Routing

- Custom Slug — This is the unique URL identifier for your article.
- Example:
https://sharetxt.live/blog/your-custom-slug - The slug is automatically generated from your Post Title, but you can modify it.
- Rules:
- Must be unique (cannot match any existing published slug).
- No empty spaces (use hyphens
-instead). - Keep it short, descriptive, and SEO-friendly.
Attribution
This section is very important for proper authorship:
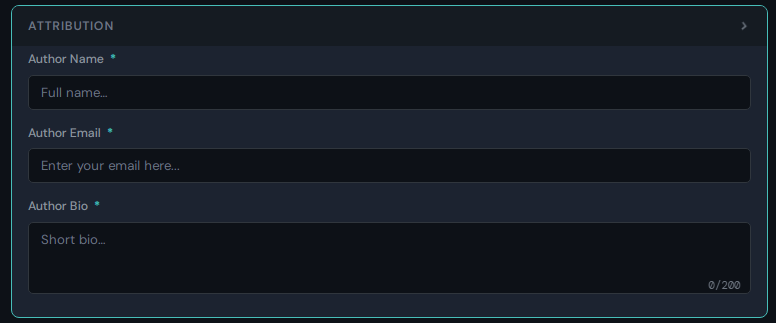
- Author Name — Your full name as you want it displayed.
- Author Email — Your primary email address. This is critical because:
- Publication status updates will be sent here.
- The live link will be emailed to this address.
- Author Bio — A short professional biography (2–4 sentences recommended). This will appear alongside your article.
Assets
Upload your visuals by providing direct image URLs:
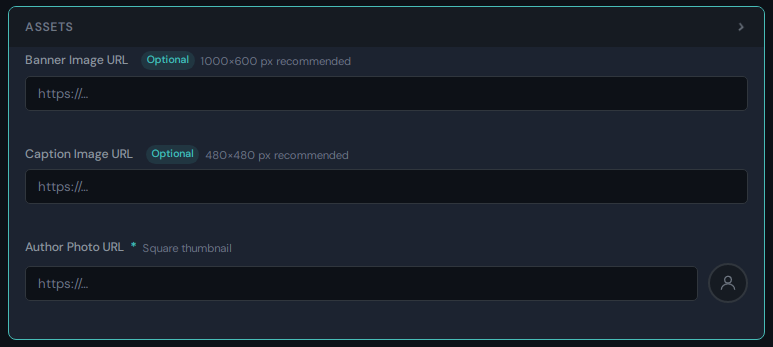
- Banner Image URL — Recommended size: 1000px × 600px.
- Caption Image URL — Recommended size: 480px × 480px (square 1:1 ratio).
- Author Image URL — Recommended size: ~120px (square 1:1 ratio).
Tips:
- You can host images on Imgur, Google Drive, Cloudinary, or any reliable image hosting service.
- After pasting the URL, check the preview section — the images should load.
- If images don’t appear, the link may be invalid or inaccessible. Fix the URL or contact support@sharetxt.live for hosting assistance.
Publisher Links
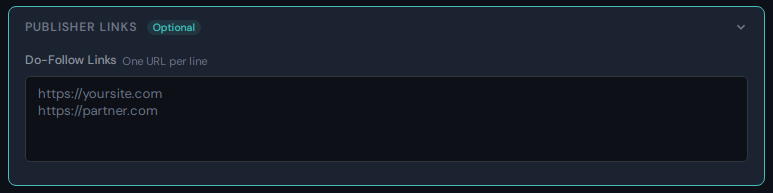
- Paste any links you want to include in your article (one full URL per line).
- These links will receive do-follow attributes when published.
- Important: The more links you add, the higher the publishing cost.
Note that each link here must match exactly the full link in your article that you want to assign dofollow
Markdown Content
This is where you write the full body of your article.
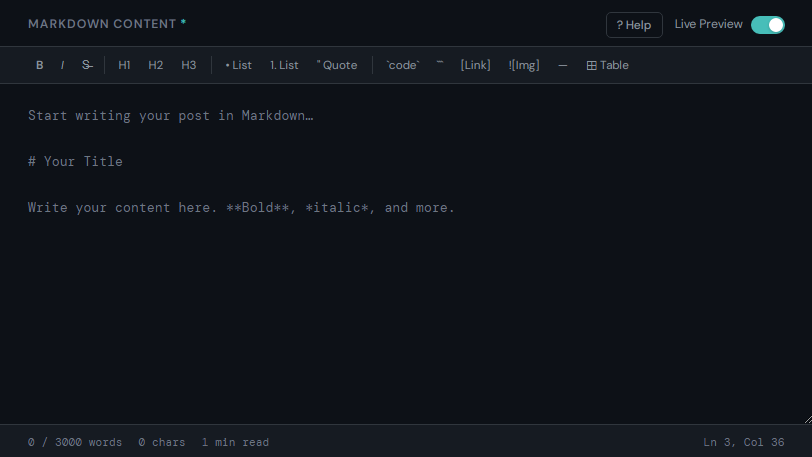
- The editor supports Markdown formatting.
- Supported features include: headings (H1, H2, etc.), bold, italic, strikethrough, lists, links, images, blockquotes, and more.
- Click the ? Help button to see the full list of supported Markdown syntax.
- Live Preview toggle — Turn this on to see real-time updates in the preview pane as you type.
3. Previews Section
On the right side of the publisher dashboard is the Previews Section. This powerful feature allows you to see exactly how your article will look before you publish it.
The preview pane is divided into three important tabs:
1. Webpage Preview

- Shows how your article will appear on the actual ShareTXT website.
- You can see the banner image, title, description, author info, and the full formatted content.
- This gives you a real feel of the final reading experience for visitors.
2. SERP Preview
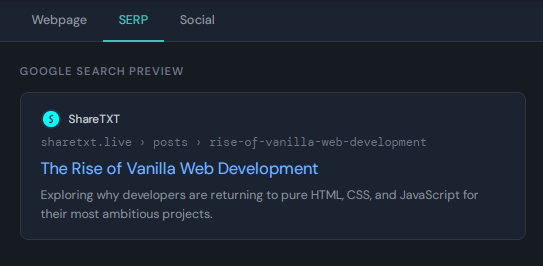
- Displays how your article will look in Search Engine Results Pages (Google, Bing, etc.).
- Shows the SEO Title, SEO Description, and the final URL (with your custom slug).
- Helps you optimize for better click-through rates from search engines.
3. Social Preview
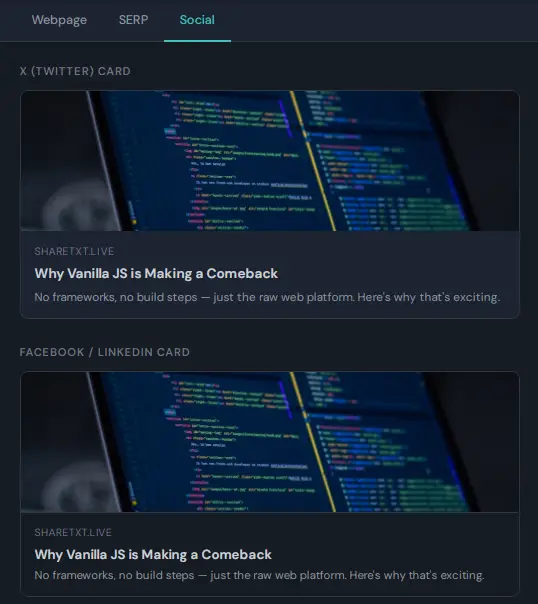
- Shows how your article will appear when shared on social media platforms like X (Twitter), Facebook, LinkedIn, etc.
- Displays the Social Title, Social Description, and the banner/caption image as a social card.
- Very useful for ensuring your post looks attractive when promoted.
Pro Tip: Regularly switch between these three previews as you edit. This helps you create a well-optimized article that performs great on the website, in search results, and when shared on social media.
Once you’re satisfied with how everything looks across all three previews, you’re ready to publish.
Publishing Your Article
After filling out all the required fields and reviewing your article across all three previews, you’re ready to publish.
Final Steps to Publish:
- Review Everything: Double-check your title, description, images, links, and content. Make sure the previews look good.
- Click the Publish Button: Located on the top navigation bar.
- Cost Summary Modal: A modal will appear showing the total cost to publish your article.
The cost depends on factors such as the number of Publisher Links (do-follow links) you added.
- Choose Payment Method: Select your preferred payment option and complete the transaction.
- Success Confirmation: Once payment is successful, you will see a success modal.
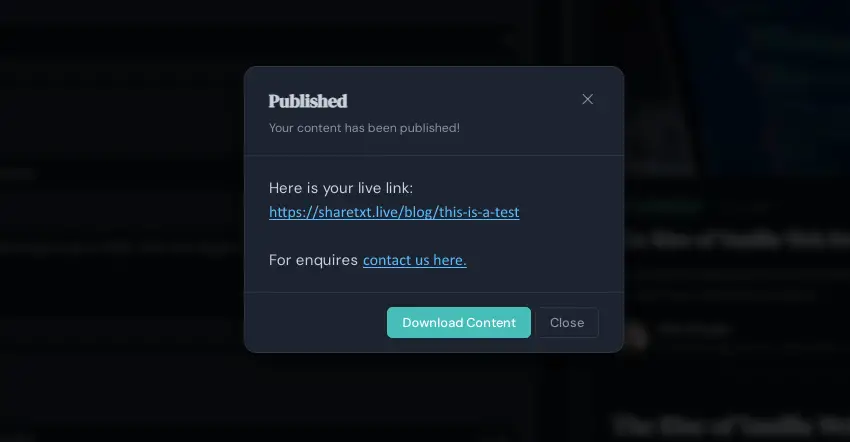
What Happens Next?
- You will receive an email at your Author Email address with:
- Confirmation that your article has been published.
- Your live article link.

- In the success modal, you have the option to Download all your data (recommended).
Then click Okay.
Post-Publication Checklist
- Visit your live link (e.g.,
https://sharetxt.live/blog/your-post-slug). - Carefully inspect the article to ensure everything appears as expected (images, formatting, links, etc.).
- Share your published article on social media using the optimized social metadata.
Important Note:
All published content on ShareTXT is subject to review as stated in our Terms of Service . ShareTXT reserves the right to remove or unpublish any content that violates the platform’s guidelines.
Congratulations! 🎉
You have successfully published your content on ShareTXT.
Additional Tips & Best Practices
Here are some proven tips to help you get the most out of publishing on ShareTXT and maximize the quality and performance of your content:
Content Quality & Optimization
- Write high-quality, original content. Well-researched and valuable articles tend to perform better and have higher chances of being promoted by ShareTXT.
- Keep your Post Title clear, compelling, and under 60 characters.
- Write a Post Description that genuinely summarizes the article and encourages clicks (max 160 characters).
- Use proper Markdown formatting: headings (H2, H3), bullet points, bold text, and images to improve readability.
Images & Visuals
- Always use high-quality images. Blurry or broken images hurt the reader experience.
- Follow the recommended dimensions:
- Banner Image: ~1000×600 px
- Caption Image: 480×480 px (square)
- Author Photo: ~120×120 px (square)
- Test all image URLs in the preview before publishing. If an image doesn’t load, replace the link immediately.
Links & SEO
- Be strategic with Publisher Links. Only add links that are truly relevant. Remember: more links = higher publishing cost.
- Create a clean, descriptive slug (e.g.,
how-to-improve-productivity-2026instead of random text). - Use the SERP and Social Previews to fine-tune your titles and descriptions for better click-through rates.
Common Mistakes to Avoid
- Leaving the Author Email field with a non-primary or temporary email.
- Using spaces or special characters in the slug.
- Forgetting to review all three previews (Webpage, SERP, Social) before clicking Publish.
- Not saving/downloading your data after successful publication.
Workflow Tips
- Use the Demo button first to familiarize yourself with the editor.
- Write your full article in a separate Markdown editor (like Typora or Notion) and then paste it in if you prefer.
- Use Focus Mode when writing the main content to avoid distractions.
- Double-check everything one final time before hitting the Publish button.
After Publishing
- Share your live link on social media as soon as possible while using the optimized social card.
- Engage with readers who comment on your article.
- Consider publishing a series of related articles to build authority on the platform.
Frequently Asked Questions
1. How much does it cost to publish on ShareTXT?
The cost varies depending on the number of Publisher Links (do-follow links) you include in your article. The exact amount is shown in the cost summary modal before you pay. Articles with fewer or no external links are cheaper.
2. Can I edit my article after publishing?
Currently, direct editing after publication is not available. We recommend reviewing everything carefully using the previews before clicking Publish. If major changes are needed, you can contact support@sharetxt.live.
3. What image hosting services can I use?
You can use any reliable image hosting service (Imgur, Cloudinary, Google Drive public links, Postimages, etc.). Just ensure the links are direct and publicly accessible. If you have trouble, you may send your images to support@sharetxt.live for hosting assistance.
4. What happens if my chosen slug is already taken?
The system will notify you. You must choose a unique slug. We recommend adding a number, date, or relevant keyword (e.g., how-to-use-sharetxt-2026) to make it unique.
5. Do I own the rights to my published content?
Yes. You retain full ownership of your content. ShareTXT only receives a license to publish and display it on the platform.
6. How long does it take for my article to go live?
Your article usually goes live immediately after successful payment. However, all content is subject to review as stated in the Terms of Service .
7. Will my links be do-follow?
Yes. All links you add in the Publisher Links section will be published as do-follow links.
8. Can I publish multiple articles?
Yes. You can publish as many articles as you want. Simply click New Draft to start a new article after publishing one.
9. What payment methods are accepted?
We accept major payment methods (specific options are shown during checkout based on your region). All transactions are secure.
10. Who should I contact if I face any issues?
Please reach out to support@sharetxt.live or use the contact form at https://sharetxt.live/contact . Our team usually responds quickly.
Conclusion
Congratulations! 🎉
You have successfully published your content on ShareTXT using the self-publishing platform at https://publisher.sharetxt.live .
Your article should now be live and accessible to readers worldwide, complete with SEO optimization, social sharing cards, and do-follow links.
Thank you for choosing ShareTXT. We look forward to seeing more of your valuable content on the platform.
If you need any help, feel free to contact us at support@sharetxt.live.
Now go ahead and start sharing your published article!