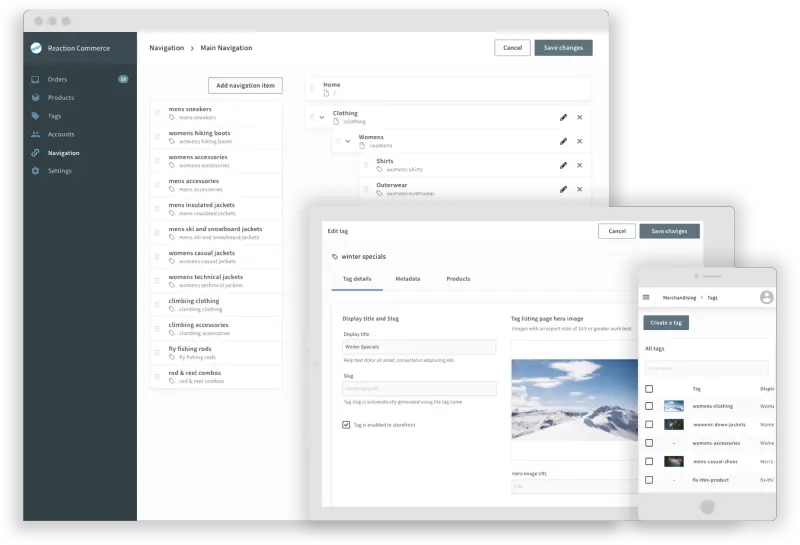
In this post, I will describe how to deploy reaction commerce in a remote VPS. The reaction commerce documentation explains how to deploy the application in a local environment.
The reaction commerce documentation does not do a good of explaining how to perform some tasks, so I hope that this article will clarify some things and get you moving along on your project.
What you'll need
- Docker
- Docker compose
- Make utility
Clone the project
git clone https://github.com/reactioncommerce/reaction-development-platform.git
cd reaction-development-platform
make
After running the make command for the first time, the application will download the following GitHub repos
- Reaction API - https://github.com/reactioncommerce/reaction.git
- Reaction Admin - https://github.com/reactioncommerce/reaction-admin
- Example storefront - https://github.com/reactioncommerce/example-storefront.git
- A mongo db database
After these are downloaded, new directories for the storefront, reaction and reaction-admin will be created in the reaction-development-platform directory
The applications will be running on
- http://localhost:4000 - storefront
- http://localhost:4080 - reaction-admin
- http://localhost:3000/graphql - reaction-api
Setup reaction commerce for remote deployment
Because we will be running these applications in a remote environment and not on localhost, you need to run make stop from within the development-platform-directory to gracefully stop the docker containers.
Now, kill all docker containers by running
docker rm -f $(docker ps -a -q)
This will remove all the containers and their environment variables, we want to set up reaction for remote deployment.
Head over to the following directories and change the path from http://localhost: to the IP address of your VPS, such as http://123.11.23.32:___.
- reaction/.env
- reaction/.env.example
- reaction-admin/.env
- reaction-admin/.env.example
- reaction-admin/imports/plugins/core/core/server/config.js
- example-storefront/.env
- example-storefront/.env.example
- example-storefront/config.js
After making the changes to these applications, go back to development-platform-directory and run the command make.
This will spin up the docker containers with the appropriate environment variables that enable reaction commerce to work well remotely.
Please note that if you run the application remotely without following the steps above, the application will be looking for resources in http://localhost, and it will fail because you are not in a local environment.
This means that you will not be able to create an account and login to your reaction admin at port 4080.
How do you use the reaction commerce playground to test API requests
The reaction commerce playground works with GraphQL, on the side of the screen, you will see the docs and schema that guides you on the commands that the GraphQL API can handle.
You can check out the full reaction commerce documentation here. You can simply copy and paste commands into the reaction commerce playground at http://your_ip_address:4080/graphql.
Some GraphQL queries in the reaction commerce playground require you to send query parameters, you can find this at the bottom left of the screen called QUERY VARIABLES.
Besides, it is the HTTP HEADERS. This is where you need to pass an authorization token to the reaction API to process your request and not give you an access denied message.
To test that your playground is working fine, enter the following
query ping {
    ping
}
The response should be
{
   "ping": "pong"
}
This shows that your deployment is working perfectly.
How do you get the access token for reaction commerce to make API requests
Now that you have the playground setup, how do you send requests remotely to your reaction commerce GraphQL API endpoint without getting access denied?.
There are basically two methods to get the access token.
- Generating an access token with hydra-tokens
- Generating a token from the GraphQL playground
Generating an access token with Hydra-Tokens
The process to implement this is described in this reaction commerce hydra token GitHub repo - https://github.com/reactioncommerce/hydra-token.
I tried to implement this approach, but it did not work. So you can check it out, but as I said at the beginning of this article, the reaction commerce application is not that well documented.
If you have successfully made use of the hydra-token CLI to generate an authorization token that worked, please share it in the comments.
Generating an access token from the GraphQL playground
Before you can generate a token, you need to sign up for an account at the reaction admin at http://your_ip_address:4080 and create a store.
Remember the email and password that you used to create that account.
Next, create a shop.
After the shop is created, you need to generate the hash for your password. This will be used to get your access token.
To do this, I created a new node application and installed the crypto-js package
npm init -y
npm install crypto-js
After that is done, I created an index.js file and wrote the following code to generate a hashed version of my reaction-admin password
const { SHA256 } = require('crypto-js');

const hashedPassword = SHA256("myRawReactionAdminPassword");
console.log(hashedPassword.toString());
After writing these lines, save the file and run the following command to execute the application
node index.js
These will run the node application, and you will get back the hashed version of your password that you can now use in the reaction playground to get your access token.
502913bfdd49eab564282dff101e6d167321237eeec66eedb2a438ed80fdeaa0
So, how do you get the reaction commerce authorization/access token?
Firstly, head over to the reaction commerce GraphQL playground at:
http://your_ip_address:3000/graphql
Secondly, copy and paste the following mutation:
mutation authenticate(
  $serviceName: String!
  $params: AuthenticateParamsInput!
) {
  authenticate(serviceName: $serviceName, params: $params) {
    sessionId
    tokens {
      refreshToken
      accessToken
    }
    user {
      ...userFields
    }
  }
}
fragment userFields on User {
  id
  emails {
    address
    verified
  }
  username
}
Thirdly, copy and paste the following as your QUERY VARIABLES. Ensure to replace the values for email and password with your reaction commerce admin email and the hashed password as described above
{
  "serviceName": "password",
  "params": {
     "password": "502913bfdd49eab564282dff101e6d167321237eeec66eedb2a438ed80fdeaa0",
  "user": {"email": "registeredemail@gmail.com"}
 }
}
The password is hashed with crypto-js. It has an NPM package that you find here.
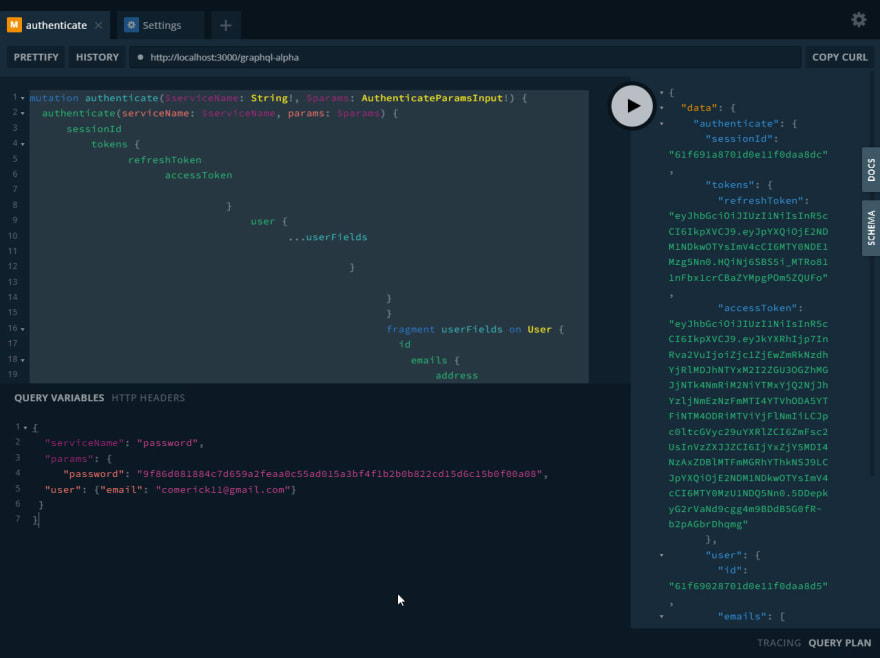
Finally, after sending your request, you will get the access token, refresh token and some other information in the following format:
{
  "data": {
    "authenticate": {
      "sessionId": "61f84e24f6f7c0651ee419c9",
      "tokens": {
        "refreshToken": "eyJhbGciOiJIUzI1NiIsInR5cCI6IkpXVCJ9.eyJpYXQiOjE2NDM2NjI4ODQsImV4cCI6MTY0NDI2NzY4NH0.-oSKl2BNUrcRaK3MghQp2DGEhBdGNUd8YVg3oqU4sR4",
        "accessToken": "eyJhbGciOiJIUzI1NiIsInR5cCI6IkpXVCJ9.eyJkYXRhIjp7InRva2VuIjoiMmZmMjkzZTQ4YTc1M2ZjNWI5NjFhYWQ4ZTUyYzc5YTU0MDkwZDgxMzMwZWI0ZTIyYmMyYWE4M2U1ZTM4MzljNDI1NDVjMjY4OTVkYTNiMjdlYjBmMWEiLCJpc0ltcGVyc29uYXRlZCI6ZmFsc2UsInVzZXJJZCI6IjYxZjdhNGNkZjZmN2MwNjUxZWU0MTljNiJ9LCJpYXQiOjE2NDM2NjI4ODQsImV4cCI6MTY0MzY2ODI4NH0.Qc2NTNYFzteH4ibFfHMT0Mt5eLgURAnOK-3mu-IIhaA"
      },
      "user": {
        "id": "61f7a4cdf6f7c0651ee419c6",
        "emails": [
          {
            "address": "youremail@gmail.com",
            "verified": false
          }
        ],
        "username": null
      }
    }
  }
}
Alternatively, if you wish to execute this query from code, call this endpoint:
POST http://your_ip_address:3000/graphql
function graphql(query, variables = {}) {
	const graphqlSessionName = "PageSession";
	return new Promise(async (resolve, reject) => {
		const data = sessionStorage.getItem(graphqlSessionName);
		if (data) {
			resolve(JSON.parse(data));
		} else {
			await fetch("/graphql", {
				method: "POST",
				headers: {
					"Content-Type": "application/json"
				},
				body: JSON.stringify({
					variables,
					query
				})
			}).then(function(result) {
				result.json().then((data) => {
					sessionStorage.setItem(graphqlSessionName, JSON.stringify(data));
					resolve(data);
				});
			});
		}
	});
}
Now, whenever you want to successfully make a request that requires authentication, simply copy the access token from the response above, save it and add it to the HTTP HEADERS like this.
{
	"Authorization": "eyJhbGciOiJIUzI1NiIsInR5cCI6IkpXVCJ9.eyJkYXRhIjp7InRva2VuIjoiMmZmMjkzZTQ4YTc1M2ZjNWI5NjFhYWQ4ZTUyYzc5YTU0MDkwZDgxMzMwZWI0ZTIyYmMyYWE4M2U1ZTM4MzljNDI1NDVjMjY4OTVkYTNiMjdlYjBmMWEiLCJpc0ltcGVyc29uYXRlZCI6ZmFsc2UsInVzZXJJZCI6IjYxZjdhNGNkZjZmN2MwNjUxZWU0MTljNiJ9LCJpYXQiOjE2NDM2NjI4ODQsImV4cCI6MTY0MzY2ODI4NH0.Qc2NTNYFzteH4ibFfHMT0Mt5eLgURAnOK-3mu-IIhaA"
}
Conclusion
That is it. You have successfully deployed reaction commerce on a remote VPS server. You have been able to create your hashed password and have obtained your access token.
If you have questions, or any tips that can add to this post, please leave it below in the comments section.
If you found this article helpful, please show me some love by buying me a cup of coffee.
Thanks and happy coding!