People talk about local AI like it's an elite, members-only lounge where the only currency they accept is high-end VRAM and liquid nitrogen cooling.
You need a beefy NVIDIA GPU that costs more than most people’s rent, piles of RAM, and the newest hardware just to have a private conversation with a chatbot. Scroll through any AI forum or comment section and you’ll see the same flexes: “Works great on my 4090”, “64GB RAM is the minimum”, “Don’t even try without at least 32GB VRAM.”
After a while it gets frustrating. I got tired of it.
So I did what any disruptor would do: I looked at my dusty old Windows 7 PC from 2010, with its wheezing dual-core CPU and just 3.8GB of usable RAM, and thought… “Let’s see if we can make this dinosaur bite back.”
I spent weeks studying tiny models, aggressive quantization, and CPU-first tools instead of accepting the “you need new hardware” narrative. The truth I found was exciting: with the right optimizations and some honest trade-offs, you really can run a modern local LLM on ancient hardware.
It won’t win any speed or intelligence records. But it works. It’s private. It’s offline. And it feels incredibly satisfying.
If you're curious about how these systems actually work under the hood, or you want to build your own AI-powered tools, learning the fundamentals of programming and web development will unlock it for you. Modern AI tools are becoming increasingly accessible, but understanding how to work with them gives you far more control than just using prebuilt apps.
In this guide, I’ll walk you through exactly how I turned my 16-year-old Windows 7 machine into a functional offline AI workstation using KoboldCPP and Qwen 2.5 0.5B.
No expensive upgrades. No cloud subscriptions. Just pure old-school tinkering that actually delivers. Or you can be like this dude that spent 2k to run a local LLM on prem . There is nothing wrong with that.
The Vintage Beast
Let me show you the humble specs of the machine I used for this experiment. A Windows 7 64-bit machine that’s now officially 16 years old. Here’s what I’m working with:
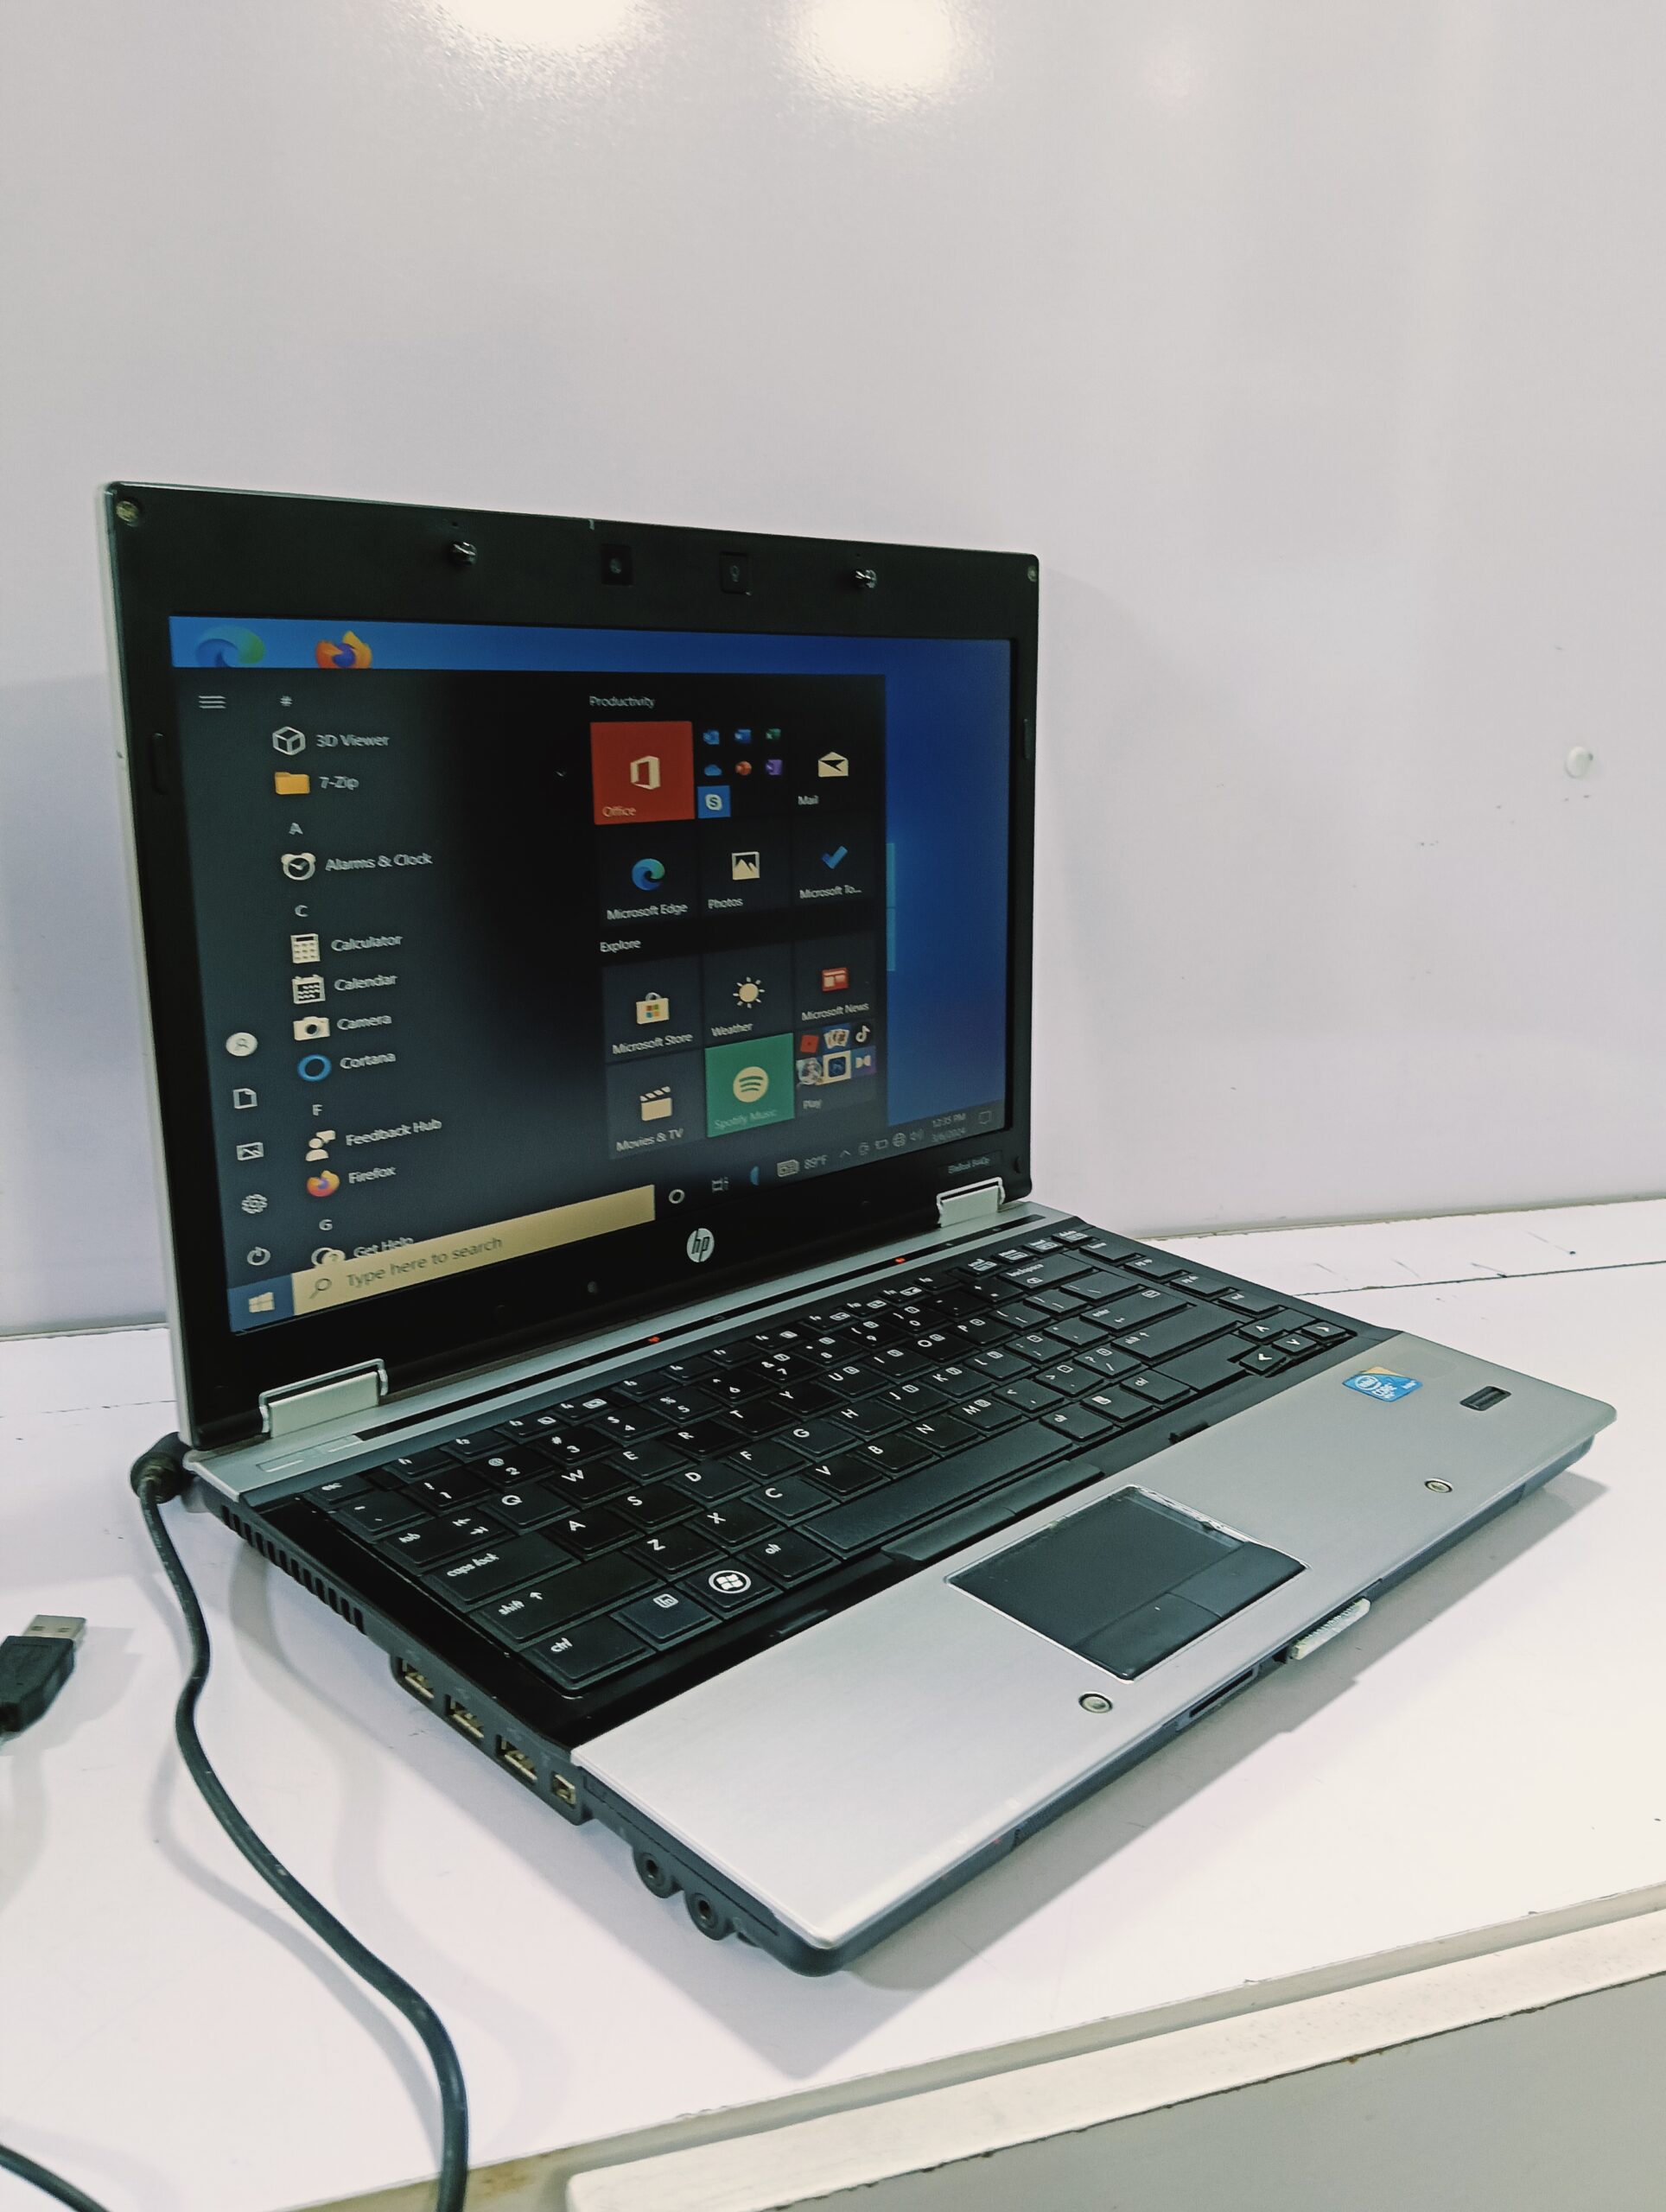
My old HP EliteBook 8440p
- OS: Windows 7 Professional 64-bit
- RAM: 4GB physical → 3.8GB usable
- CPU: Dual-core processor with Hyper-Threading (basically 2 physical cores / 4 logical threads)
- GPU: None — just the old integrated graphics
- Storage: 150GB - Traditional mechanical hard drive
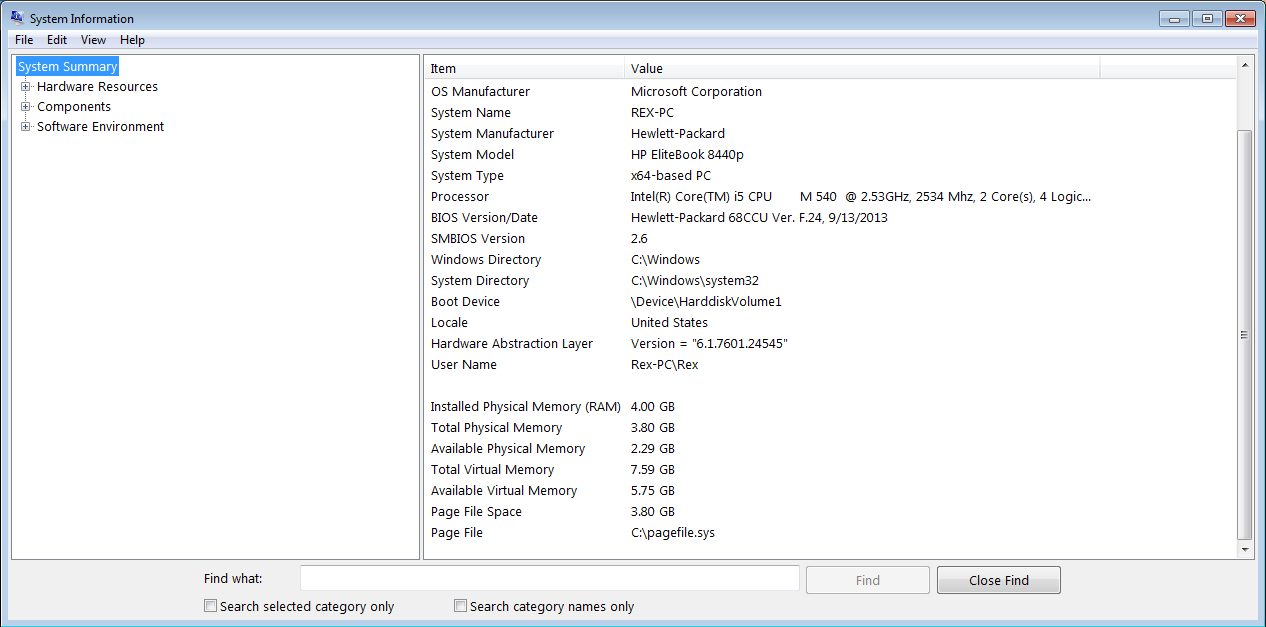
To see this window, open command prompt then type msinfo32
In short, this machine was considered decent when Windows 7 was still new.
I opened Task Manager before starting anything and it was already using ~2.0GB of RAM just sitting idle with nothing but the basics running. That left me with roughly 1.8GB of breathing room for an entire Large Language Model.
Most modern AI guides would laugh at these specs and immediately close the tab. But that’s exactly why I chose this machine as my stress test.
This wasn’t just an old PC, it was the perfect worst-case scenario. If I could make a functional local LLM run here, then a lot of people with slightly better (but still old) hardware could definitely do it too.
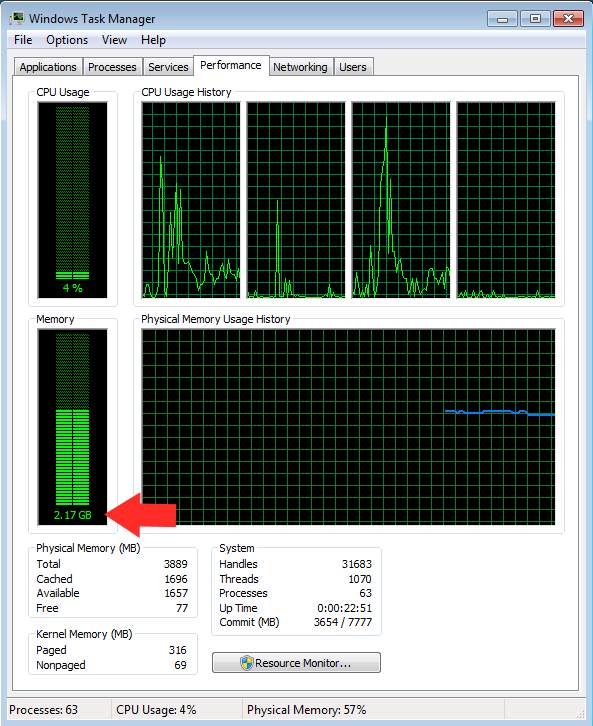
The task manager screenshot showing 3.8GB total RAM and the system using 2.17GB when idle
I knew going in that I would have to be extremely disciplined with resources and optimise aggressively. No fancy 8B or 13B models. No long context windows. No unnecessary background processes. Everything had to be stripped down to the absolute minimum.
But instead of feeling limiting, it felt like a fun challenge.
Choosing the Right Brain: Why Qwen 2.5 0.5B?
With only about 1.8GB of free RAM to play with, I didn’t have the luxury of being picky. I needed the smallest, most efficient model that could still feel useful.
I tried a few tiny models early on, but most were either too dumb or too unstable. Then I found Qwen 2.5 0.5B.
This little model turned out to be the perfect match for my ancient machine. It’s small enough to actually fit in my limited RAM, yet surprisingly coherent, helpful with writing, and decent at following instructions. For a 0.5 billion parameter model, it punches well above its weight.
Here’s why I settled on it:
- Tiny memory footprint, especially when quantized.
- Modern knowledge (trained more recently than many other small models).
- Good instruction-following for its size.
- Multilingual (bonus if you ever need it).
Quantization 101 (The Real MVP)
The real hero wasn’t just the model. It was GGUF quantization.
I went with the Q4_K_M version. This aggressive compression shrinks the model down to roughly 400-500MB on disk and keeps peak RAM usage manageable on my system.
Rule of thumb I learned:
- Bigger quant (Q8_0) = better quality, higher RAM usage
- Smaller quant (Q3_K, Q2_K) = smaller size, more quality loss
For my 3.8GB machine, Q4_K_M struck the best balance between intelligence and stability.
I downloaded the GGUF file from Hugging Face
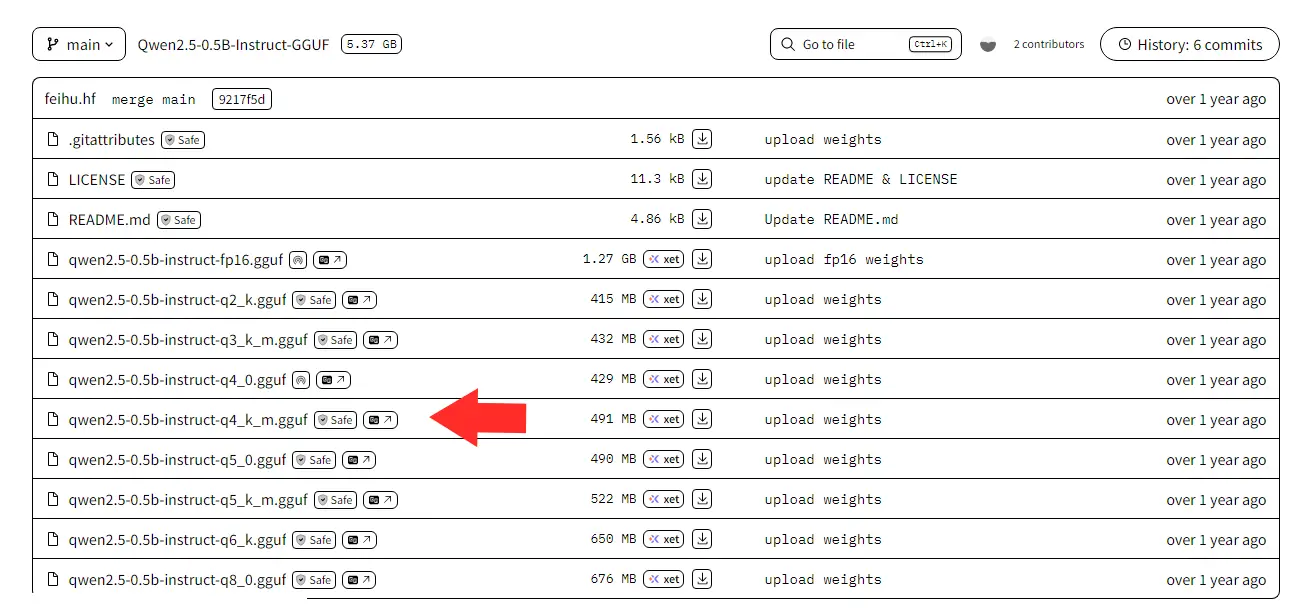
Ensure you download the qwen2.5-0.5b-instruct-q4_k_m.gguf
Then I placed it in a simple folder:
C:\Documents\models\ai\qwen2.5-0.5b-instruct-q4_k_m.gguf
No fancy folder structures. Just one file, easy to find.
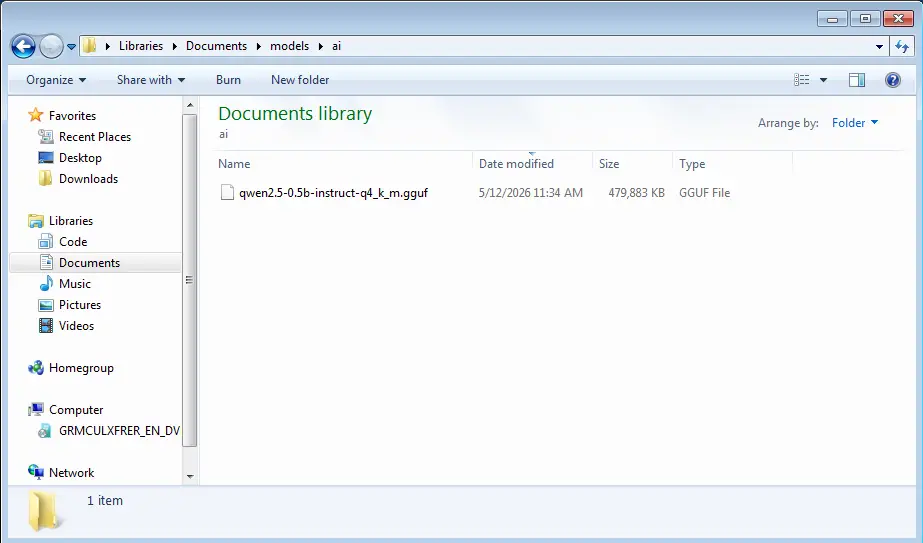
The downloaded model file in my local file system folder
This combination of Qwen 2.5 0.5B + Q4_K_M, became the sweet spot that let my 16-year-old PC actually run a modern LLM instead of just crashing or freezing.
It’s not going to write your novel or replace Claude, but it’s more than capable of being a helpful offline assistant.
The Perfect Tool for Old Hardware: KoboldCPP
Now that I had the right model, I needed software that wouldn’t fight my ancient Windows 7 machine.
After trying a few options, like LM Studio, and Ollama; KoboldCPP stood out as the clear winner.
Why KoboldCPP? Because it’s simple, powerful, and built for situations exactly like mine.
- It’s completely portable — just one
.exefile. No Python installation, no complex environments, no dependency nightmares. - It runs great on CPU-only systems.
- It gives you a nice web UI (Kobold Lite) plus full API support.
- And best of all, it works perfectly on ancient machines because of the great backward compatibility baked in (its a beautiful piece of software).
I downloaded the koboldcpp-1.112.2 nocuda (CPU-only) version from github .
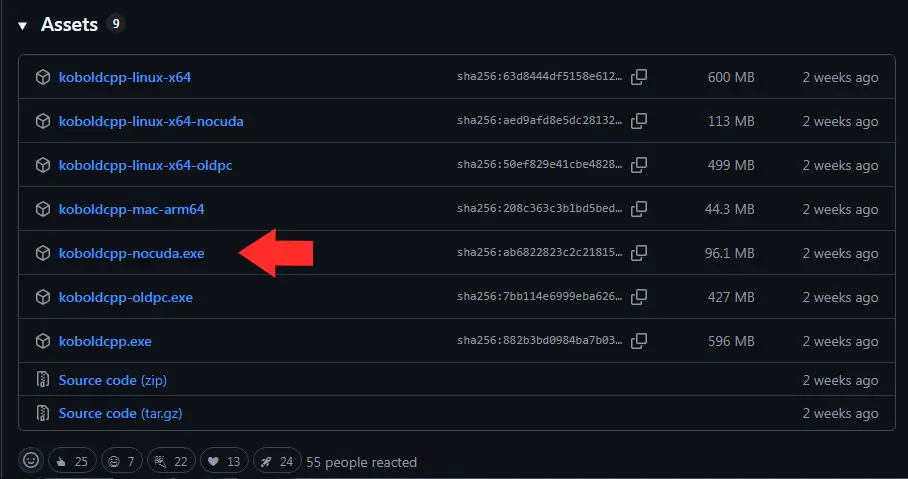
Ensure you download koboldcpp-nocuda.exe
Pro tip for Windows 7 users: If the nocuda.exe version does not work for you, download the oldpc.exe version. If it still does not work, then go back one or two releases. The older builds are usually more forgiving with legacy hardware.
I placed the KoboldCPP folder in program files
C:\Program Files\koboldcpp\
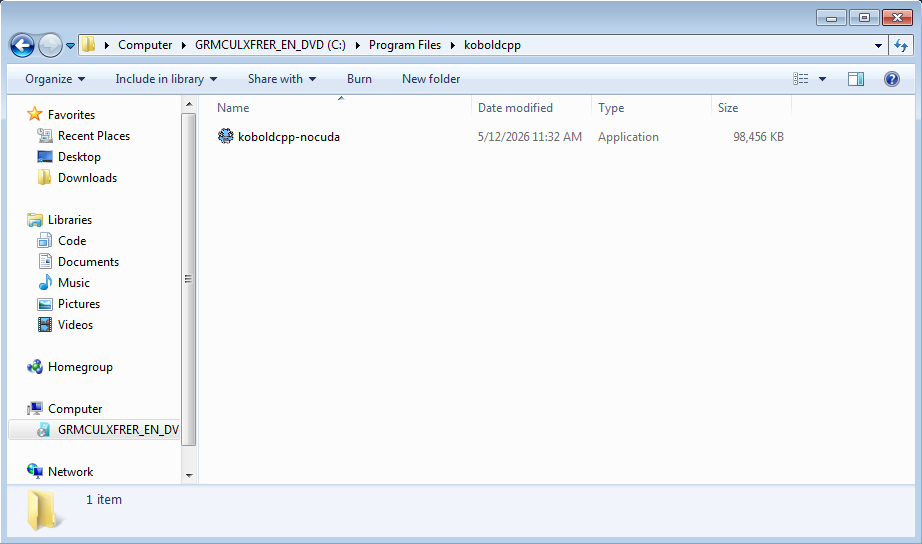
The downloaded koboldcpp-nocuda.exe file
No installation needed. Double-click the .exe, and you’re ready to configure. Two windows will pop up when you execute the file. The koboldcpp terminal window will appear first to load everything, and then a few moments later the settings window will pop up.
Settings That Prevent Crashes
With KoboldCPP ready and the model downloaded, it was time to configure everything carefully. On a machine with only 3.8GB RAM, one wrong setting can turn a smooth launch into a blue screen or instant crash.
Here’s exactly what I did before hitting “Launch”:
- Backend: In the Quick Launch tab, select the Failsafe Mode (Older CPU) from the dropdown.
- Below that are a couple of checkboxes. I checked the Launch Browser and the Use ContextShift checkboxes. I left the others unchecked.
- Context Length: In the Quick Launch tab, set the context size slider to 1024 (I even tested 512 first). Longer context size eats RAM fast. This is a very important setting.
- GGUF Text Model: In this input box, I clicked it and navigated to
C:\Documents\models\ai\qwen2.5-0.5b-instruct-q4_k_m.ggufand selected the qwen gguf file which I downloaded earlier. - Threads: Navigate to the Hardware tab and set the number of threads to 2 (matching my physical cores). Using 4 logical threads sometimes caused instability. To check the number of cores and logical threads your system have, open command prompt and paste the following command
wmic cpu get NumberOfCores, NumberOfLogicalProcessors
I also made sure to:
- Close unnecessary programs that might be using RAM.
- Disable startup apps.
- Have Task Manager open on the side so I could monitor RAM in real-time.
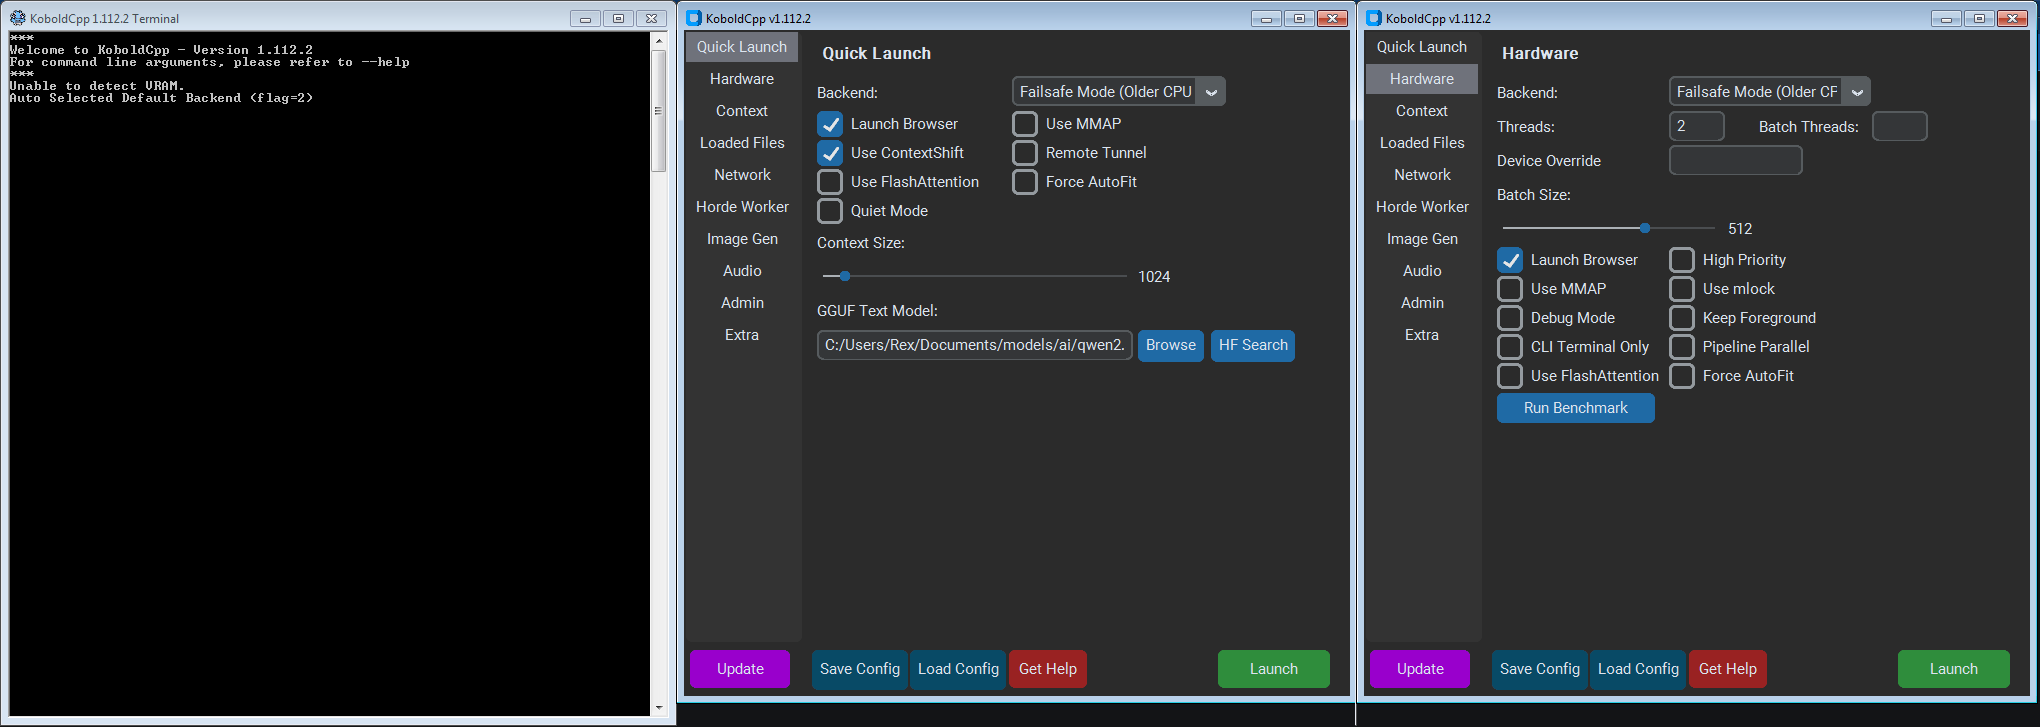
My Koboldcpp settings
Once everything was set, I clicked the Save Config button to save my settings for next time I opened the app. I took a deep breath and clicked the big Launch button.
Launching the Model
I clicked the Launch button and held my breath.
The terminal window popped up and immediately started loading the Qwen 2.5 0.5B model. The CPU usage jumped a bit, but everything was still normal.
Here’s what happened:
- The model took about 45 - 60 seconds to fully load.
- RAM usage climbed steadily from ~2.0GB all the way up to 2.65GB - 2.87GB at peak.
- The system stayed responsive. No freezing, no crashing.
Seeing that RAM number stay under 3GB felt like a small victory. My 16-year-old PC was actually doing it.
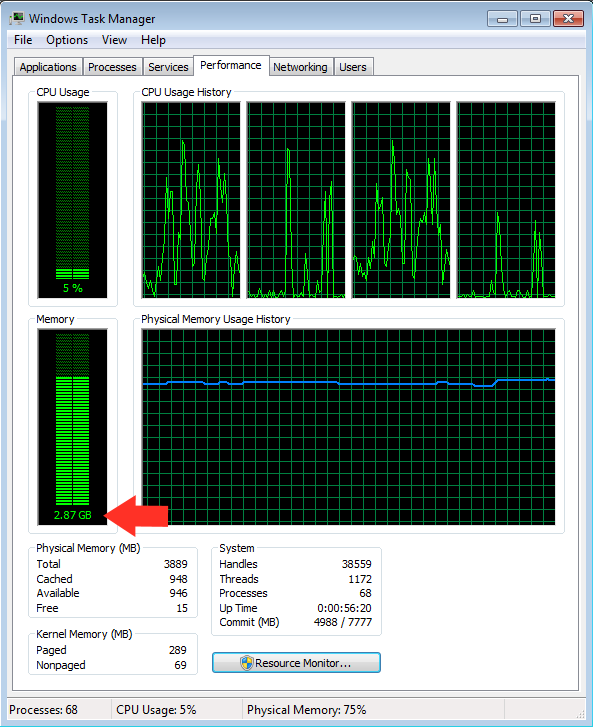
Screenshot showing my task manager ram usage after i started the KoboldCPP server
Once loading finished, KoboldCPP displayed the familiar “Server started” message and gave me the local web address.
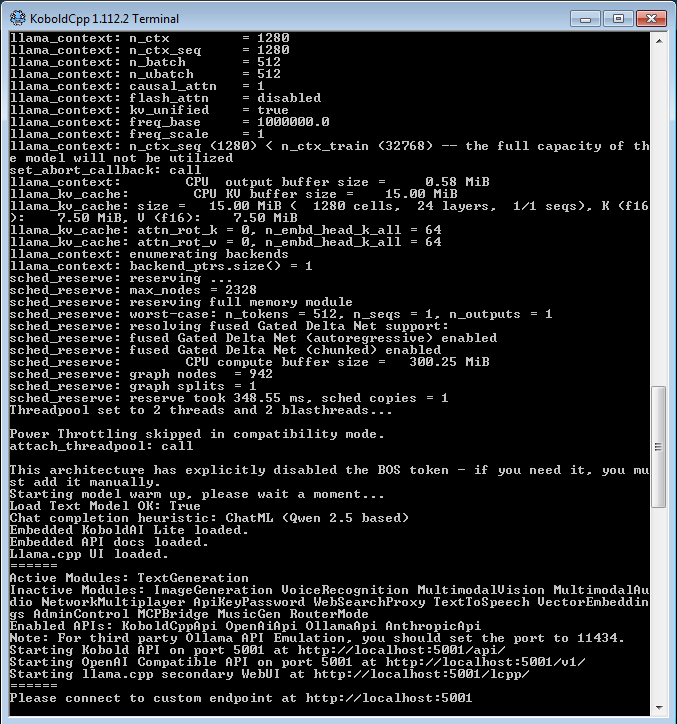
A screenshot of the KoboldCPP terminal on launching the Qwen model
I opened my browser, typed in http://localhost:5001, and there it was; Kobold Lite interface, ready for chatting.
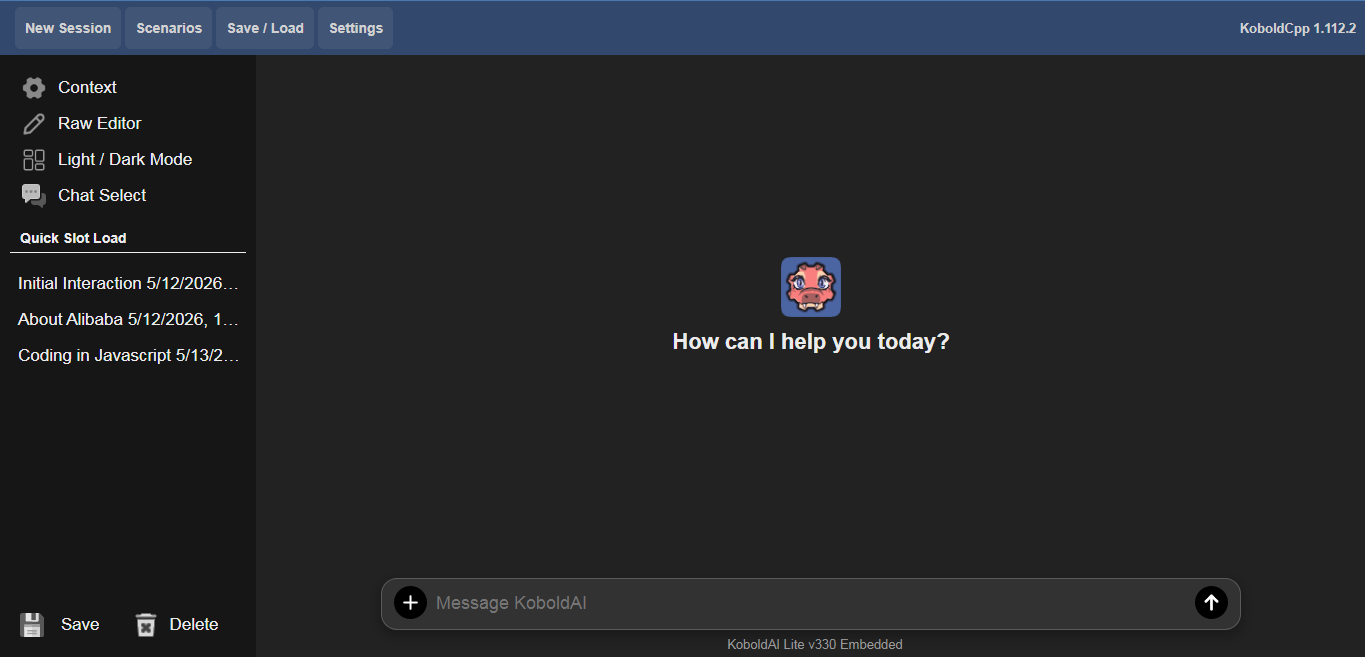
Screenshot showing the KoboldCPP welcome screen in http://localhost:5001
It was alive.
Not the fastest AI in the world, but it was running locally on hardware most people would have thrown away years ago. The satisfaction was real.
First Chat & Testing
First real test I ran:
"Write a short, encouraging message to someone who feels sick."
The response came back steadily. It was coherent, warm, and surprisingly on-point for such a tiny model.
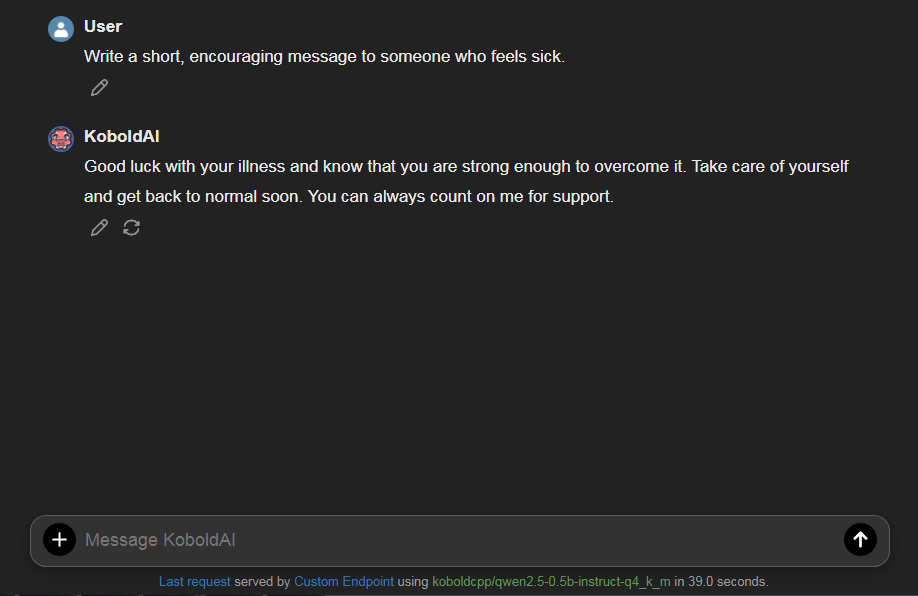
My first chat using the KoboldAI Lite UI
I followed up with more tests, creative writing, simple coding explanations, and translation tasks. It handled all of them well enough to be genuinely useful.
Tokens Per Second (Speed Test)
To measure performance, KoboldCPP clearly displays the generation speed in tokens per second (TPS) at the end of each response.
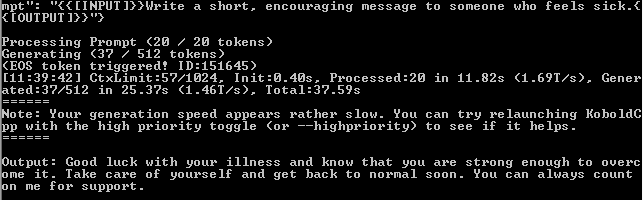
Terminal response showing number of tokens generated and the generation speed
From the screenshot, we can see that the system generated 37 tokens in 25.37s. That gives us a generation speed of about 1.46 Tokens per second (TPS). From my other tests, my consistent average was about 1.17 – 2.4 TPS.
It’s slow compared to modern hardware, but very usable for thoughtful conversations and writing assistance. You have time to think while it responds. Almost like chatting with a very calm person.
Testing the API with VS Code REST Client
In addition to the file server which you can visit on http://localhost:5001, with your web browser, you can also interact with the AI via API. I wanted to test the API properly, so I used the REST Client extension in Visual Studio Code.
Simply open VS code, click on the extensions tab and search for Rest Client. You should see something like this:
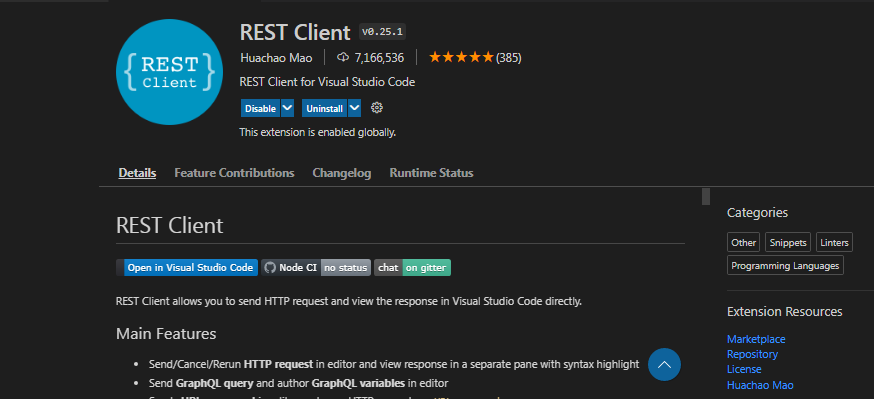
The Rest Client extension on the VS code marketplace
Install the extension, restart VS code and in any folder create a file called request.rest and paste the below code in there
POST http://localhost:5001/v1/chat/completions
Content-Type: application/json

{
    "messages": [
      {
        "role": "user",
        "content": "What model are you?"
      }
    ]
}
The response came back cleanly with the generated text. This confirmed that my old Windows 7 machine wasn’t just running a chatbot. It was running a fully functional local AI server that other tools could talk to.
{
    "id": "chatcmpl-A885367",
    "object": "chat.completion",
    "created": 1778670498,
    "model": "koboldcpp/qwen2.5-0.5b-instruct-q4_k_m",
    "usage": {
        "prompt_tokens": 13,
        "completion_tokens": 12,
        "total_tokens": 25
    },
    "choices": [{
        "index": 0,
        "message": {
            "role": "assistant",
            "content": "I am a large language model created by Alibaba Cloud.",
            "tool_calls": []
        },
        "finish_reason": "stop",
        "logprobs": null
    }]
}
As you can see, both the request and response follows the OpenAI convention. Here is the terminal response
When working with local servers, APIs, and multiple tools during development, keeping credentials and access tokens organized becomes important. Many developers use password managers to avoid reusing or exposing sensitive keys across projects.

KoboldCPP terminal response to API request
From the screenshot, we can see that the system generated 12 tokens in 5.56s. That gives us a generation speed of about 2.16TPS.
Optimization & Troubleshooting
Getting the model to load was great, but making it pleasant to use required some tweaking.
Fixing Common Issues
The most frequent problem I faced was the Context length exceeded warning in the terminal. This happened because the Web UI and the backend settings were not perfectly matched.
Solution: Always set the Context Length in the Kobold Lite web UI to the same value (or lower) as what you set when launching the model (1024 in my case). This eliminated most warnings.
To do this, fire up the browser, go to http://localhost:5001. Click on Settings > Samplers. You will see a UI that look like this:
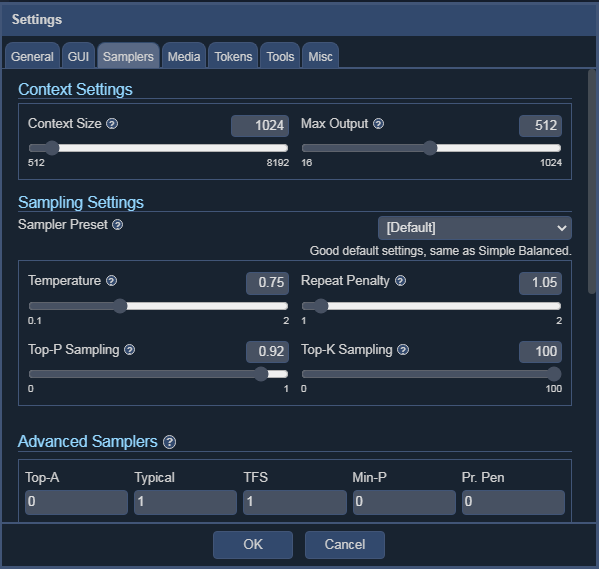
A screenshot of KoboldAI Lite UI Settings
In the Context Settings section, move the Context Size slider to the same value that you setup when launching KoboldCPP. Then set the max output to less than or equal to the context size. This will eliminate most terminal warnings.
Sampler Settings for Small Models
Small models like Qwen 2.5 0.5B behave best with careful sampler settings:
- Temperature: 0.7 – 0.85 (too high = nonsense, too low = repetitive)
- Top P: 0.9 – 0.95
- Top K: 40
- Repetition Penalty: 1.1 – 1.15
These values gave me the best balance of creativity and coherence.
Troubleshooting Ancient Hardware
Here are issues I ran into and how I solved them:
- Model fails to load / crashes: Lower context to 512, try Q3_K_M instead of Q4_K_M, or add
--noavx2 --nommapflags. - Very slow generation: Close all other programs. Disable Windows Aero/visual effects. Make sure only 2 threads are used.
- DLL / compatibility errors: Use an older release of KoboldCPP (the “failsafe” or “nocuda” builds from a few months earlier worked best on Windows 7).
- High idle RAM usage: Use a lightweight browser (I used Firefox with hardware acceleration off) and disable unnecessary startup programs.
After these adjustments, the experience became much more stable and enjoyable.
Real Uses and Why This Matters
Once the setup was stable, I stopped treating it as a toy and started using it as a real tool.
I’ve used it for writing assistance, brainstorming blog posts, explaining technical concepts, basic coding help, translation, and even creative role-play. Because it runs completely offline, I can feed it private notes or sensitive ideas without any worry about cloud companies seeing my data.
Looking ahead, this kind of lightweight local setup opens the door to something even more interesting: running small autonomous AI agents.
On low-resource hardware like my old Windows 7 machine, you can experiment safely with simple agent workflows (chaining prompts, using the local API, or scripting basic tasks). It’s a great way to learn agent development without huge costs or security risks.
If you’re interested in the darker side of AI agents, I recommend reading this eye-opening piece: The Shadow Admin Threat: How Autonomous AI Agents Could Introduce Undetectable System Backdoors . Running everything locally on old hardware gives you much better control and peace of mind compared to cloud-based agents.
Once you understand how local AI systems work, even at a small scale, it opens up opportunities beyond personal use. Many developers and freelancers now offer AI setup, automation, and custom tooling services to clients who don’t want to deal with the technical side themselves.
Final Thoughts: The AI Revolution Belongs to All of Us
You don’t need a $2,000 GPU or a brand-new PC to participate in the AI revolution.
Even with a 16-year-old Windows 7 machine, 3.8GB RAM, KoboldCPP, and Qwen 2.5 0.5B (Q4_K_M), I have demonstrated a fully functional, private, offline AI workstation that delivers ~2.2 tokens per second.
It’s not the most powerful setup in the world, but it’s private, it's offline, it costs nothing extra, and it works.
Running AI models locally already improves privacy significantly, but many users also consider securing their network activity when experimenting with different tools and downloads, especially when testing new software environments.
So if you have an old laptop or desktop gathering dust, don’t retire it yet. The future of AI isn’t just for people with the latest hardware, it’s for stubborn tinkerers too.
Here is my summary
- Hardware: 2010 Windows 7, 3.8GB RAM, Dual-core CPU
- Model: Qwen 2.5 0.5B Q4_K_M
- Peak RAM: ~3.12GB
- Speed: 2.1 - 2.4 tokens/second
- Result: Victory ✅
Recommended Tools for Running Local AI on Low-End Hardware
If you're interested in experimenting with local AI on older hardware or lightweight systems, here are some useful resources and references that can help you go further:
- Books on practical machine learning and LLM fundamentals
- Guides on quantized models and CPU inference optimization
- References on building local AI workflows and automation pipelines
These kinds of resources help bridge the gap between just running a model and actually understanding how to optimize and extend it.